

Setting up a reliable network can feel overwhelming, but understanding a cat 6 wiring diagram doesn't have to be complicated. Whether you're managing IT for one office or dozens of locations, knowing how Cat6 cables work will save you time, money, and headaches down the road.
Think of Cat6 cables as the highways of your network - they carry all your data from point A to point B. When they're set up correctly, everything runs smoothly. When they're not, you'll spend way too much time troubleshooting problems that could have been avoided.
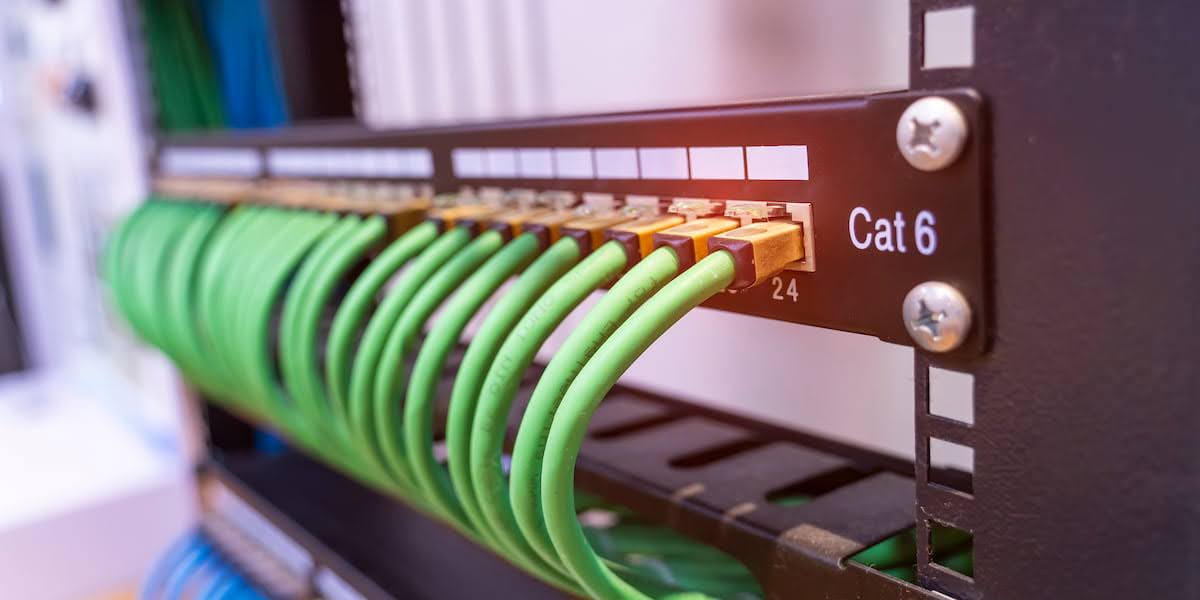
Why Cat6 Cables Matter for Your Business
Cat6 cables are like the upgraded version of older network cables. They can handle much faster internet speeds - up to 10 times faster than older cables in many cases. That means quicker file transfers, smoother video calls, and less waiting around for things to load.
Here's what makes Cat6 special: these cables can carry data at speeds up to 10 Gbps for distances up to 180 feet. For most office setups, that's more than enough to handle everything from basic internet browsing to streaming 4K videos for presentations.
The secret is in how they're built. Cat6 cables have four pairs of wires twisted together in a specific way. This twisting helps prevent interference - kind of like how noise-canceling headphones block out background sound. Each pair is twisted at a slightly different rate, which helps keep your data signals clean and clear.
What Makes Cat6 Different from Older Cable Types
If you've ever wondered why your old network feels slow, the cable type might be the problem. Let's break down the differences:
Cat5 vs Cat6 Speed Comparison:
- Cat5: Maximum speed of 100 Mbps - good for basic internet and email
- Cat5e: Up to 1 Gbps - handles most modern office needs
- Cat6: Up to 10 Gbps - ready for high-demand applications and future growth
Real-World Performance Differences:
- File sharing: A 1GB file that takes 80 seconds on Cat5 transfers in just 8 seconds on Cat6
- Video conferencing: Cat6 handles multiple HD video calls without slowdowns
- Cloud applications: Faster upload and download speeds mean less waiting
- Backup operations: Critical data backups happen much faster
How Cat6 Construction Improves Your Network
The way Cat6 cables are built makes all the difference in performance. Here's what's happening inside that cable:
Advanced Wire Twisting:
- Each of the four wire pairs is twisted at different rates
- This prevents signals from interfering with each other
- Better twist consistency means cleaner data transmission
- Less interference equals fewer network errors and retransmissions
Improved Insulation:
- Thicker cable jacket protects against physical damage
- Better separation between wire pairs reduces crosstalk
- Some Cat6 cables include a plastic separator called a spline
- This extra protection helps maintain performance over longer distances
Higher Quality Materials:
- Better copper conductors carry signals more efficiently
- Improved connector design creates more reliable connections
- Stricter manufacturing tolerances mean consistent performance
- Better quality control results in fewer defective cables
Common Questions About Cat6 Performance
"Is Cat6 really worth the extra cost compared to Cat5e?" Absolutely. While Cat6 costs about 10-20% more than Cat5e, it provides much better future-proofing. You won't need to replace your cables when you upgrade your network equipment, and the improved performance is noticeable immediately.
"How far can I run Cat6 cables before performance drops?" Cat6 cables maintain their full 10 Gbps speed for up to 55 meters (about 180 feet). Beyond that distance, they still work but at slower speeds. For most office environments, this distance limit isn't a problem.
"Will Cat6 work with my existing network equipment?" Yes. Cat6 cables are backward compatible with all older network equipment. They'll work with Cat5 and Cat5e devices, though you'll only get the speed of the slowest component in your network.
"Do I need special tools to install Cat6 cables?" The installation process is the same as other network cables, but Cat6 is a bit thicker and requires more careful handling. You'll need standard crimping tools, cable strippers, and testers - the same tools used for other cable types.
Power Over Ethernet Capabilities
One of the biggest advantages of Cat6 cables is their ability to carry both data and electrical power. This feature, called Power over Ethernet (PoE), opens up many possibilities:
Devices That Can Be Powered Through Cat6:
- Wireless access points - no need for separate power outlets
- Security cameras - simpler installation with just one cable
- VoIP phones - cleaner desk setup without power adapters
- LED lighting systems - smart lighting controlled through your network
- Door access systems - integrated security with network connectivity
PoE Power Levels:
- Standard PoE: Up to 15.4 watts - good for basic devices like phones
- PoE+: Up to 30 watts - handles more demanding devices like access points
- PoE++: Up to 90 watts - powers high-end equipment like PTZ cameras
Cost-Benefit Analysis for Business Owners
When you're deciding whether to upgrade to Cat6, here are the key factors to consider:
Upfront Investment:
- Cable cost: About 10-20% more than Cat5e
- Installation: Same labor costs as other cable types
- Equipment: Works with existing network gear
Long-Term Savings:
- Future-proofing: Won't need cable replacement for 10+ years
- Reduced troubleshooting: Fewer network problems mean less downtime
- Energy efficiency: PoE devices often use less power than traditional setups
- Simplified installations: One cable for power and data reduces complexity
Return on Investment Timeline: Most businesses see benefits immediately through improved network performance and start seeing cost savings within 2-3 years through reduced maintenance and energy costs.
Performance in Different Business Environments
Cat6 cables perform differently depending on your specific business needs:
Small Offices (Under 25 People):
- Handles all current needs with room for growth
- Supports multiple HD video calls simultaneously
- Fast file sharing and cloud application access
- Future-ready for new technology adoption
Medium Businesses (25-100 People):
- Manages high network traffic without slowdowns
- Supports complex applications like video editing and large databases
- Handles multiple users accessing cloud services simultaneously
- Reliable performance for business-critical applications
Large Organizations (100+ People):
- Backbone for high-speed network infrastructure
- Supports data-heavy applications across multiple departments
- Handles large file transfers without affecting other users
- Critical for maintaining productivity in demanding environments
Environmental Factors That Affect Performance
Your building environment can impact how well Cat6 cables perform:
Temperature Considerations:
- Cat6 works well in normal office temperatures (60-80°F)
- Extreme heat can affect signal quality over long distances
- Cold environments are generally less problematic
- Proper ventilation helps maintain optimal performance
Interference Sources to Avoid:
- Fluorescent lighting - can cause signal noise
- Electric motors and heavy machinery
- Other electrical cables running parallel for long distances
- Radio frequency equipment like wireless transmitters
Installation Environment:
- Plenum-rated cables required in air handling spaces
- Outdoor-rated cables needed for exterior installations
- Shielded versions available for high-interference environments
- Proper cable management prevents physical damage
Breaking Down the Ethernet Wiring Diagram Basics
An ethernet wiring diagram is basically a map that shows you which wire goes where. It might look confusing at first, but once you understand the pattern, it's actually pretty straightforward.
Every Cat6 cable has eight wires inside, arranged in four color-coded pairs. These wires connect to an RJ45 plug (that's the clear plastic connector you probably recognize) that has eight pins. Each wire needs to connect to the right pin, or your network won't work properly.
The colors follow a simple pattern that's the same everywhere in the world. You've got orange and white-orange, green and white-green, blue and white-blue, and brown and white-brown. This color coding makes it easy for any technician to understand what's going on, whether they're in your main office or a branch location across the country.

The Two Main Wiring Standards: T568A and T568B
Here's where things get interesting - there are actually two different ways to arrange those colored wires, called T568A and T568B. Both work perfectly fine, but you need to pick one and stick with it throughout your entire network.
Think of it like choosing to drive on the right side of the road versus the left side. Either choice works, but everyone in the same area needs to follow the same rule, or you'll have problems.
T568B is more common in business settings these days. With this standard, the orange pair goes on pins 1 and 2, green on pins 3 and 6, blue on pins 4 and 5, and brown on pins 7 and 8. Most commercial installations use this setup.
T568A was the original standard and you'll still see it in some government buildings and homes. The main difference is that the orange and green pairs are swapped compared to T568B.
The key thing to remember is consistency. Pick one standard for your whole organization and make sure every cable follows that same pattern. Mixing standards in the same network is like having some of your team use metric measurements while others use imperial - it just creates confusion.
Understanding the History Behind These Standards
The reason we have two standards isn't because engineers couldn't agree - it's actually about different needs and timing. Here's how it all started:
T568A - The Original Standard:
- Developed first by the telecommunications industry
- Based on older telephone wiring practices
- Uses green pairs for the primary data connection
- Still required in some government and military installations
- Matches the color scheme used in telephone systems
T568B - The Business Standard:
- Developed later to match existing business practices
- Uses orange pairs for the primary data connection
- Became popular because it matched AT&T's wiring practices
- Easier for technicians to remember the sequence
- Now the most common choice for new commercial installations
Detailed Pin Assignments for Each Standard
Let's break down exactly where each wire goes in both standards. Understanding this helps when you're troubleshooting or need to match existing installations.
T568A Pin Configuration:
- Pin 1: White with green stripe
- Pin 2: Solid green
- Pin 3: White with orange stripe
- Pin 4: Solid blue
- Pin 5: White with blue stripe
- Pin 6: Solid orange
- Pin 7: White with brown stripe
- Pin 8: Solid brown
T568B Pin Configuration:
- Pin 1: White with orange stripe
- Pin 2: Solid orange
- Pin 3: White with green stripe
- Pin 4: Solid blue
- Pin 5: White with blue stripe
- Pin 6: Solid green
- Pin 7: White with brown stripe
- Pin 8: Solid brown
The Key Difference: Notice that only pins 1, 2, 3, and 6 are different between the two standards. The blue pair (pins 4 and 5) and brown pair (pins 7 and 8) stay in the same positions for both standards.
Common Questions About Wiring Standards
"What happens if I accidentally mix T568A and T568B in the same network?" Your network will still work in most cases, but you might experience performance issues or occasional connection problems. Modern equipment is pretty forgiving, but it's better to stay consistent to avoid headaches later.
"How do I know which standard my existing network uses?" Look at any existing wall jacks or patch panels. The color sequence should be visible, or you can test a known working cable with a cable tester that shows the pin configuration. Most commercial buildings built after 2000 probably use T568B.
"Can I convert from one standard to the other?" Yes, but it requires replacing or re-terminating all your cables and connections. For large networks, this is usually only done during major renovations or upgrades. It's not something you'd do casually.
"Does one standard perform better than the other?" No. Both standards provide identical performance when implemented correctly. The choice is purely about consistency and compatibility with your existing infrastructure.
Industry Preferences and Regional Differences
Different industries and regions have developed preferences for one standard over the other:
Who Typically Uses T568A:
- Government facilities and military installations
- Some residential installations
- Older commercial buildings (pre-2000)
- International locations following different standards
- Installations that need to match existing telephone wiring
Who Typically Uses T568B:
- Most new commercial office buildings
- Data centers and server rooms
- Retail and hospitality businesses
- Healthcare facilities
- Educational institutions
Regional Considerations:
- United States: T568B is dominant in commercial settings
- International: Varies by country and local practices
- Some regions follow their own national standards
- Always check local requirements for specific projects
Making the Right Choice for Your Organization
When deciding which standard to use, consider these factors:
If You're Starting Fresh:
- Go with T568B for most commercial applications
- It's easier to find technicians familiar with T568B
- More compatible with modern business equipment
- Better availability of pre-made cables and components
If You Have Existing Infrastructure:
- Test your current cables to determine what standard you're using
- Stick with whatever standard is already in place
- Document your choice clearly for future technicians
- Consider conversion only during major renovations
For Multi-Location Businesses:
- Pick one standard and use it everywhere
- Document your choice in your IT standards manual
- Train your team on the chosen standard
- Make sure all contractors know your preference
Documentation and Labeling Best Practices
Once you've chosen a standard, proper documentation becomes critical:
What to Document:
- Which standard you're using (T568A or T568B)
- Date of installation for each cable run
- Cable routes and termination points
- Any deviations or special circumstances
- Contact information for the installation team
Labeling Systems:
- Use consistent labels on both ends of every cable
- Include the wiring standard in your labeling scheme
- Consider color-coding for different cable types
- Make labels weatherproof for harsh environments
Creating Installation Guidelines:
- Write clear procedures for your chosen standard
- Include photos or diagrams showing proper pin assignments
- Specify acceptable cable types and brands
- Set quality standards for installations and testing
Testing and Verification Procedures
No matter which standard you choose, proper testing ensures everything works correctly:
Basic Continuity Testing:
- Verify each wire connects to the correct pin
- Check for shorts between different wire pairs
- Confirm no wires are crossed or missing
- Test both ends of every cable
Performance Testing:
- Measure signal strength and quality
- Check for interference between wire pairs
- Verify the cable meets Cat6 specifications
- Document test results for future reference
Troubleshooting Common Problems:
- Reversed pairs: Usually caused by mixing standards
- Poor connections: Often from incorrect crimping
- Signal interference: Can result from untwisted wires
- Length issues: Performance drops over long distances
Training Your Team on Standards
Getting everyone on the same page prevents costly mistakes:
What Technicians Need to Know:
- How to identify which standard is being used
- Proper color sequence for your chosen standard
- Quality standards for cable preparation and termination
- Documentation requirements for new installations
Creating Standard Operating Procedures:
- Step-by-step instructions with photos
- Quality checkpoints throughout the process
- Common mistakes to avoid
- When to call for help or additional training
Ongoing Education:
- Regular refresher training on current standards
- Updates when standards or equipment change
- Cross-training between different team members
- Knowledge sharing from experienced technicians
Future-Proofing Your Standard Choice
While both T568A and T568B will continue working for years to come, think about future needs:
Technology Trends:
- New equipment increasingly expects T568B
- International standards are moving toward T568B
- Training materials focus more on T568B
- Replacement parts are more available for T568B
Planning for Growth:
- Choose the standard that matches your long-term plans
- Consider what standards your industry typically uses
- Think about compatibility with cloud services and modern equipment
- Plan for easier maintenance and troubleshooting
Straight-Through vs Crossover Cables Made Simple
You might hear people talk about straight-through and crossover cables, but here's the good news - you probably don't need to worry much about crossover cables anymore.
Straight-through cables use the same wiring pattern on both ends. These are what you'll use 99% of the time - connecting computers to switches, switches to routers, or devices to wall outlets. It's called "straight-through" because each wire goes straight from pin 1 on one end to pin 1 on the other end, pin 2 to pin 2, and so on.
Crossover cables used to be needed when connecting similar devices directly to each other, like computer to computer. They're called crossover because some of the wires literally cross over to different pins. But here's the thing - most modern network equipment is smart enough to figure this out automatically. It's like having a universal translator that adapts to whatever you plug in.
This means you can use straight-through cables for almost everything, which makes your life much easier and reduces the chance of grabbing the wrong cable type.
How to Wire a Cat6 Cable Step by Step
Making your own Cat6 cables isn't rocket science, but it does require some patience and the right tools. Here's how to do it without pulling your hair out.
First, you'll need to strip about an inch of the outer jacket off the cable. Be careful not to nick the inner wires - think of it like peeling an apple where you want to remove just the skin without cutting into the fruit.
Next, you'll see those four twisted pairs we talked about. Untwist them just enough to arrange them in the right order according to your chosen standard. Don't untwist more than you have to - those twists are important for keeping your signal clean.
Line up all eight wires and trim them so they're all the same length - about half an inch past where the jacket ends. This part is important because uneven wires won't make good contact in the connector.
Finally, slide the wires into the RJ45 connector and use a crimping tool to secure everything in place. A good crimp should feel solid and all the wires should be visible through the clear plastic connector.
Testing Your Work (Because Nobody's Perfect)
Even experienced technicians test their cables, and you should too. A simple cable tester costs less than $50 and can save you hours of troubleshooting later.
Basic testers will tell you if each wire is connected properly and if there are any shorts or breaks. They're like a spell-checker for your cables - they catch the obvious mistakes that could cause problems.
If you're doing a lot of cables or need to meet specific performance requirements, you might want to invest in a more advanced tester. These can measure things like signal strength and interference levels to make sure your cables will perform at their best.
Common problems include wires that aren't making good contact, wires connected to the wrong pins, or cables that got damaged during installation. Most of these issues are easy to fix once you know what to look for.
Getting the Best Performance from Your Installation
Making cables is only part of the story. How you install them makes a big difference in how well they work. Here are some tips that can save you from performance problems later.
Don't bend Cat6 cables too sharply - they don't like tight corners any more than you'd like sleeping in a bed that's too small. Keep bends gentle, and never kink or crush the cables.
Keep network cables away from power lines and other electrical equipment when possible. Electrical interference can slow down your network or cause connection problems. If you have to run cables near electrical equipment, try to cross them at right angles rather than running them parallel.
Label everything clearly. Future you (or the next person who has to work on your network) will thank you when they don't have to trace cables through the ceiling to figure out where they go.
Planning for Multiple Locations
If you're managing networks across several locations, having a standard approach makes everything easier. Using the same cat 6 wiring diagram and installation practices at every site means your team can work efficiently anywhere.
Document everything. Take photos of your wiring, create simple diagrams showing where cables go, and keep records of what equipment is installed where. This information becomes incredibly valuable when you need to troubleshoot problems or add new equipment later.
Consider the unique needs of each location, but try to standardize as much as possible. Different buildings might have different challenges, but using the same cable types, connectors, and labeling systems everywhere will make your life much easier.
Creating Your Master Standardization Plan
When you're dealing with multiple locations, consistency becomes your best friend. Here's how to build a plan that works everywhere:
Developing Universal Standards:
- Choose one wiring standard (T568A or T568B) for all locations
- Select specific cable brands and types to use company-wide
- Create a standard color-coding system for different cable purposes
- Establish consistent labeling formats that work in any building
- Set quality requirements that apply to every installation
Equipment Standardization Benefits:
- Technicians can work at any location without retraining
- Spare parts inventory becomes much simpler to manage
- Troubleshooting becomes faster when everything follows the same pattern
- New employees learn one system that applies everywhere
- Vendor relationships become stronger with larger, consolidated orders
Building Your Standards Document:
- Create a master reference guide with photos and diagrams
- Include approved vendor lists and part numbers
- Document acceptable installation practices and quality standards
- Provide troubleshooting guides specific to your standard setup
- Keep digital copies accessible to all team members
Site Assessment and Planning Process
Every location is different, but your approach to evaluating them should be consistent:
Initial Site Survey Checklist:
- Measure distances between network equipment locations
- Identify potential sources of electrical interference
- Check existing cable infrastructure and its condition
- Evaluate environmental factors like temperature and humidity
- Assess security requirements and access restrictions
- Document any building-specific code requirements
Infrastructure Evaluation:
- Test existing cables to determine their type and condition
- Check available pathways for new cable runs
- Identify adequate power sources for network equipment
- Evaluate existing network closet space and ventilation
- Assess the need for additional cooling or environmental controls
Unique Challenge Documentation:
- Historic buildings with limited modification options
- Industrial environments with high electromagnetic interference
- Outdoor connections requiring weatherproof solutions
- High-security areas with special cable routing requirements
- Buildings with unusual construction materials or layouts
Documentation Systems That Actually Work
Good documentation saves hours of troubleshooting time and prevents costly mistakes:
Essential Documentation Components:
- As-built drawings showing actual cable routes and terminations
- Photo documentation of all connections and equipment installations
- Cable testing results with performance measurements
- Equipment inventory with model numbers and installation dates
- Contact information for local contractors and vendors
Digital Documentation Best Practices:
- Use cloud-based storage accessible from any location
- Create searchable databases with consistent naming conventions
- Include GPS coordinates for outdoor equipment locations
- Maintain version control for updated drawings and procedures
- Set up automatic backup systems to prevent data loss
Photo Documentation Standards:
- Take pictures before, during, and after every installation
- Include wide shots showing overall layout and close-ups of connections
- Use consistent lighting and angles for easy comparison
- Label photos with location, date, and technician information
- Store photos in organized folders linked to written documentation
Coordinating Multi-Site Projects
Managing installations across multiple locations requires careful coordination:
Project Planning Strategies:
- Schedule installations to minimize business disruption at each site
- Coordinate material deliveries to arrive just before installation
- Plan for different time zones when scheduling technician visits
- Build buffer time into schedules for unexpected complications
- Establish clear communication protocols between all team members
Resource Management:
- Track technician availability and travel schedules across regions
- Maintain adequate spare equipment inventory at strategic locations
- Coordinate with local contractors who understand building requirements
- Plan for different shipping times and local vendor availability
- Budget for travel costs and regional price differences
Quality Control Across Locations:
- Establish consistent testing procedures for every installation
- Require photo documentation of completed work at every site
- Schedule follow-up visits to verify long-term performance
- Create feedback systems for continuous improvement
- Maintain consistent quality standards regardless of location
Common Questions About Multi-Site Management
"How do I handle different building codes and regulations across locations?" Research local requirements during the planning phase and document any location-specific needs. Work with local contractors who understand regional codes, but maintain your core standards wherever possible. Sometimes you'll need slight variations, but document these clearly.
"What's the best way to train technicians who work at multiple sites?" Create comprehensive training materials that cover your standard practices, but also include location-specific information. Use a central training program supplemented with site-specific briefings. Regular refresher training helps maintain consistency.
"How do I manage inventory across multiple locations?" Establish regional distribution points for common items, but maintain local stock of critical spare parts. Use inventory management software that tracks items across all locations. Plan for lead times and local vendor capabilities.
"What should I do when local contractors don't follow our standards?" Provide clear specifications upfront and require adherence to your standards as part of the contract. Conduct quality inspections and don't accept work that doesn't meet your requirements. Build relationships with contractors who understand and value your standards.
Standardized Labeling Systems
A good labeling system works everywhere and makes sense to anyone:
Labeling Components That Should Be Consistent:
- Cable identification numbers following a logical sequence
- Color coding for different types of connections
- Location identifiers that scale across all sites
- Equipment naming conventions that indicate purpose and location
- Service loop and spare cable identification
Creating Location-Independent Labels:
- Use alphanumeric codes that work in any language
- Include site codes that identify the specific location
- Add installation dates for future reference
- Use durable materials that withstand environmental conditions
- Make labels large enough to read easily but small enough to fit properly
Digital Label Management:
- Maintain databases linking label codes to physical locations
- Use QR codes or barcodes for quick database access
- Keep backup lists of all label assignments
- Update databases immediately when changes are made
- Provide mobile access to labeling databases for field technicians
Managing Regional Vendors and Contractors
Working with local partners while maintaining standards requires careful management:
Vendor Selection Criteria:
- Experience with your specific cable types and standards
- Understanding of local building codes and regulations
- Availability for emergency service calls
- Willingness to follow your documentation requirements
- Track record of quality work and reliable scheduling
Contract Requirements:
- Specify exact cable types, connectors, and installation methods
- Require adherence to your testing and documentation standards
- Include quality checkpoints and acceptance criteria
- Establish clear communication protocols and reporting requirements
- Define consequences for work that doesn't meet standards
Ongoing Vendor Management:
- Conduct regular performance reviews with quantitative metrics
- Provide feedback on both successful projects and areas for improvement
- Share updated standards and procedures as they develop
- Recognize and reward contractors who consistently meet your standards
- Maintain backup vendor relationships for capacity and reliability
Technology Tools for Multi-Site Management
Modern tools can simplify the complexity of managing multiple locations:
Network Management Software:
- Centralized monitoring of all network equipment across locations
- Automated alerts for performance issues or equipment failures
- Historical performance data for trend analysis and planning
- Remote configuration capabilities for consistent settings
- Integration with documentation systems for complete visibility
Project Management Platforms:
- Coordinated scheduling across multiple sites and time zones
- Real-time progress tracking and reporting
- Document sharing and version control
- Communication tools for distributed teams
- Integration with inventory and resource management systems
Mobile Documentation Apps:
- Field-friendly interfaces for updating documentation on-site
- Photo capture and annotation capabilities
- Offline functionality for areas with poor connectivity
- GPS integration for automatic location tagging
- Synchronization with central databases when connectivity returns
Scaling Your Network Infrastructure
As your organization grows, your network infrastructure needs to grow with it:
Planning for Expansion:
- Design initial installations with future growth in mind
- Install extra capacity in cable pathways and network closets
- Choose equipment platforms that can scale up easily
- Plan network addressing schemes that accommodate new locations
- Budget for regular infrastructure updates and improvements
Maintaining Performance Standards:
- Regularly test and certify cable performance across all locations
- Update equipment to maintain consistent capabilities everywhere
- Monitor network utilization to identify capacity needs
- Plan refresh cycles for aging infrastructure
- Keep technology standards current with industry developments
Integration Challenges:
- Connecting new locations to existing network infrastructure
- Maintaining security standards across an expanding network
- Balancing local needs with global consistency requirements
- Managing increased complexity while maintaining reliability
- Training new team members on established standards and procedures
Measuring Success Across Multiple Locations
Track metrics that help you improve your multi-site network management:
Performance Metrics:
- Network uptime and reliability across all locations
- Installation time and cost consistency between sites
- Quality scores based on testing and inspection results
- User satisfaction ratings from each location
- Incident response times and resolution rates
Process Improvement Indicators:
- Reduction in troubleshooting time due to good documentation
- Decrease in installation errors through standardization
- Improved vendor performance and relationship quality
- Better resource utilization and cost management
- Enhanced team efficiency and knowledge sharing
Long-Term Success Factors:
- Consistent network performance regardless of location
- Reduced total cost of ownership through standardization
- Improved ability to support business growth and expansion
- Enhanced team capabilities and job satisfaction
- Strong vendor relationships that support ongoing success
Thinking About the Future
Technology keeps moving forward, and the network you install today needs to handle tomorrow's applications too. The good news is that Cat6 cables are pretty future-proof for most business needs.
More devices are being powered through network cables these days - things like security cameras, wireless access points, and VoIP phones. Cat6 cables handle this power delivery well, but proper installation becomes even more important to prevent overheating.
Even if you don't need super-fast speeds right now, having Cat6 infrastructure in place means you're ready when you do. It's like buying a house with good bones - you might not use every feature immediately, but you'll be glad it's there when you need it.
Wrapping Up Your Network Project
Understanding a cat 6 wiring diagram is really about building a solid foundation for your business technology. When your network infrastructure is done right, it becomes invisible - everything just works the way it should.
The time you spend planning and implementing proper Cat6 cabling pays off in reduced downtime, fewer support calls, and the flexibility to add new technology as your business grows. Whether you're setting up one office or coordinating installations across multiple locations, following these basics will set you up for success.
At Tech Service Today, we've helped thousands of businesses build reliable networks that support their goals. Our team of certified technicians understands both the technical details and the practical challenges of multi-site installations. We're available 24/7 with transparent pricing and no hidden fees, so you always know what to expect. Ready to discuss your network cabling project? Let's talk about how we can help you build the reliable infrastructure your business needs.